Blog
A number of activities and topics of interest are included in the blog posts below. For educational curriculum enhancers on Texas history, visit the Fort Bend Connection page.

|
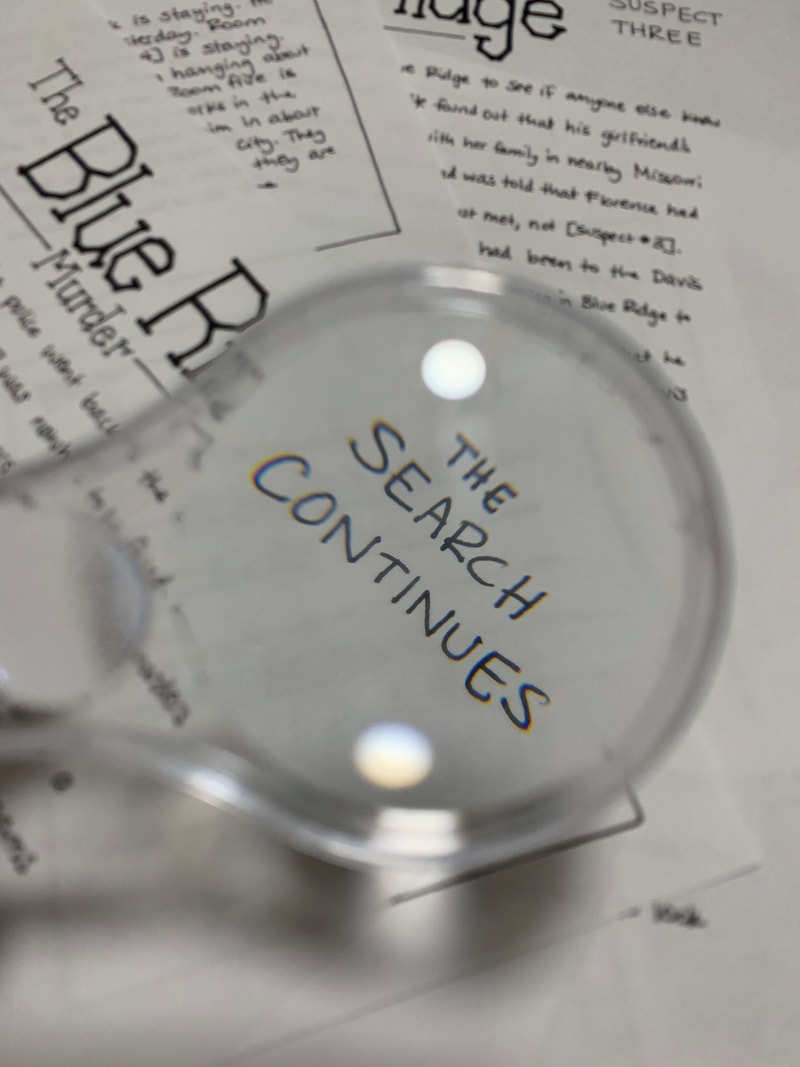
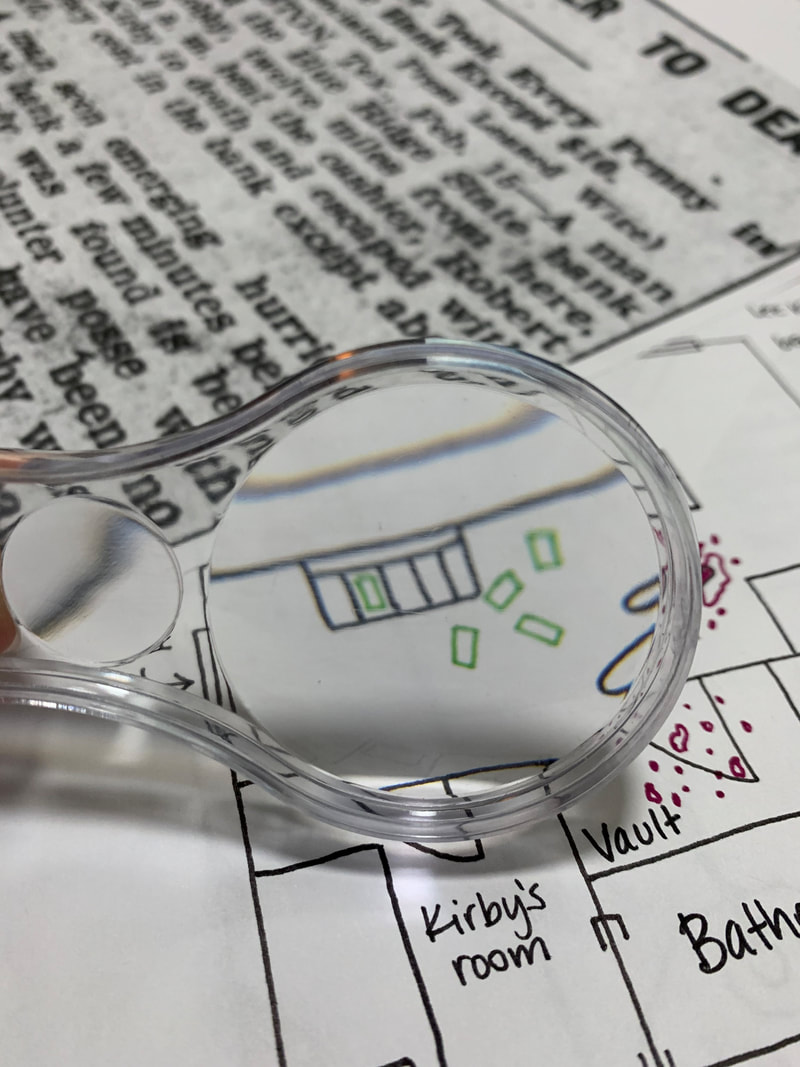
BY ALLISON HARRELL Texian Time Machine & Outreach Coordinator Can you solve the murder mystery? This is part three of a four-part series. Gather all the information you can, and then see if you can figure out the perpetrator in this historical whodunit!
0 Comments
As soon as word of the robbery spread, a posse was formed. Law enforcement officials from three counties (Fort Bend, Harris and Brazoria) came together to search Blue Ridge. Every oil field worker was tracked down and their alibi checked. Two men were arrested who had been found sleeping in the woods near Stafford, with recently-fired weapons in their possession.
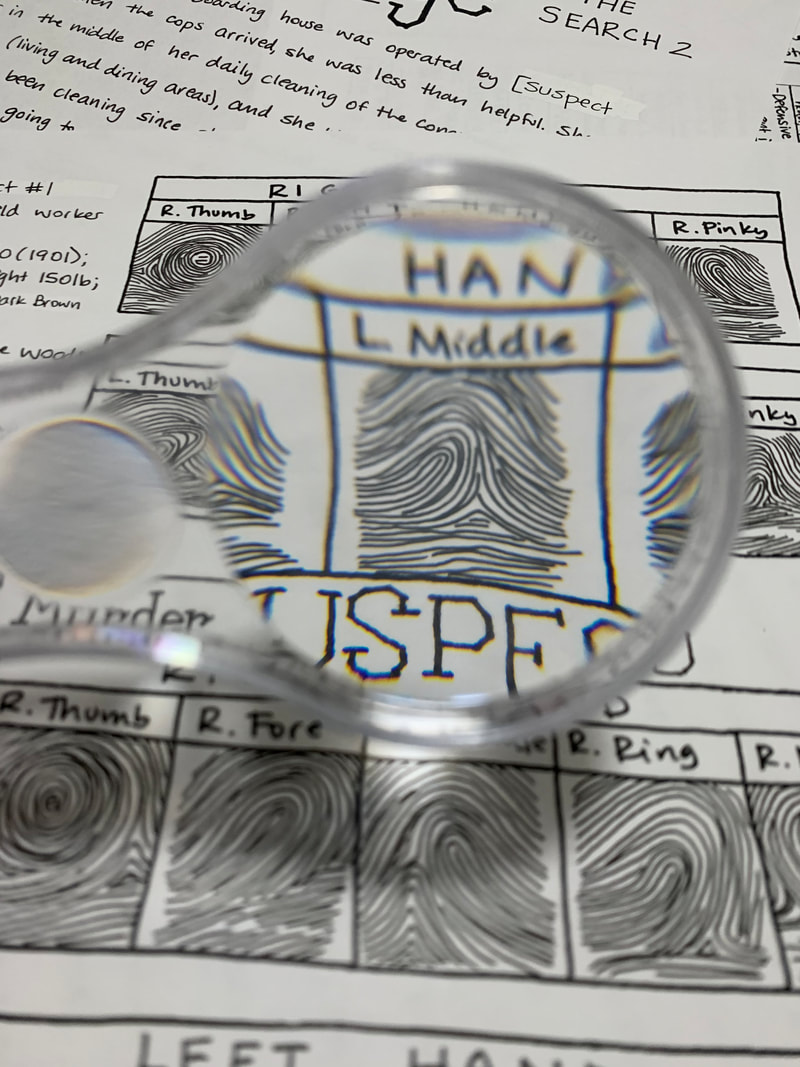
One of the buildings that was of special interest – especially to officer “Doc” Sammon – was one of the local boarding houses. The robber/murderer had been seen running in the direction of this boarding house by the young messenger boy. When the cops arrived, they found blood on the front door handle. This made Doc Sammon certain they were in the right place. This particular boarding house was operated by [Suspect 5]. When the cops arrived, she was less than helpful. She was in the middle of her dialing cleaning of the communal spaces (living and dining areas) and she was close to being done. She had been cleaning since she finished up the 8 a.m. breakfast, and wasn’t going to stop until she was done. Each of the bedrooms of the house were to be searched for evidence. However, two rooms were locked (Rooms two and three) and their occupants were nowhere to be found. The cops asked [Suspect #5] for a list of who was staying at the boarding house at that time. She promised to get them a list and look for the master keys after the living room was clean. Inez had a sweet tooth this morning and was up early looking for a treat in the Moore Home kitchen -- and she found a bunch of great vintage recipes to try! Want to join her? Happy baking!  Apple Pie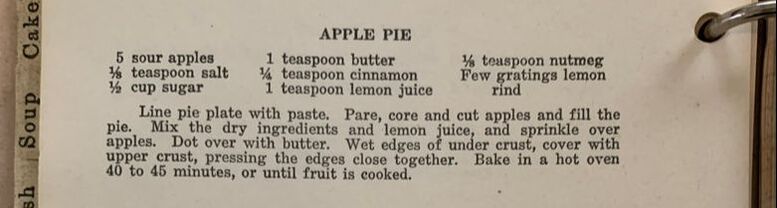
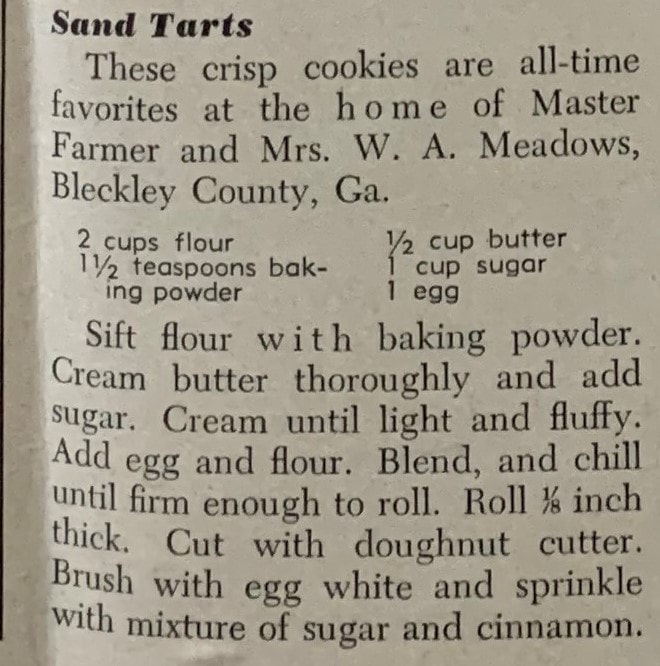
Sand Tarts
Pound Cake
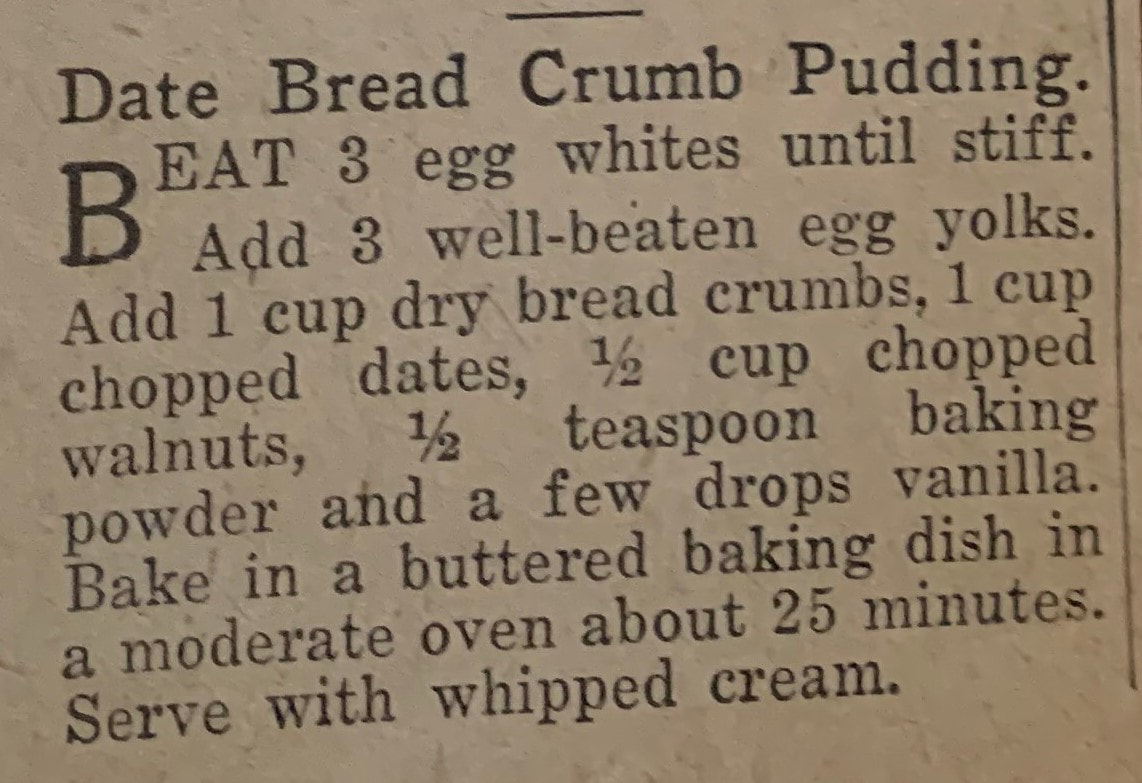
Beat egg whites until fluffy but not dry, gradually add remaining sugar, and continue beating until stiff and smooth. Fold lightly but thoroly [sic] into batter. Turn batter into buttered loaf pan or ring mold, and bake in a moderate oven (350 degrees) 60 to 70 minutes, or until done. Date Bread Crumb Pudding
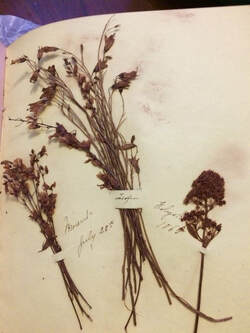
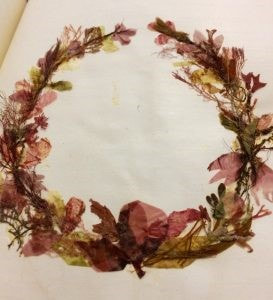
In late 1920, discovery wells were drilled and oil was found in the Blue Ridge area. This small section of eastern Fort Bend County is nestled along the Harris County border. The salt dome had been known since 1902, but no oil had been found before now. The discovery of oil made Blue Ridge a hot commodity, and a town was thrown together. Boarding houses, restaurants and stores sprang up to support all the men hoping to strike it rich in oil. On January 9, 1921, it was announced that a bank would be opening soon. January 15, 1921 saw the opening of the Blue Ridge State Bank. It was a branch of the National Exchange Bank of Houston, and operated as a private bank until February 14, when it was certified and became a state bank. 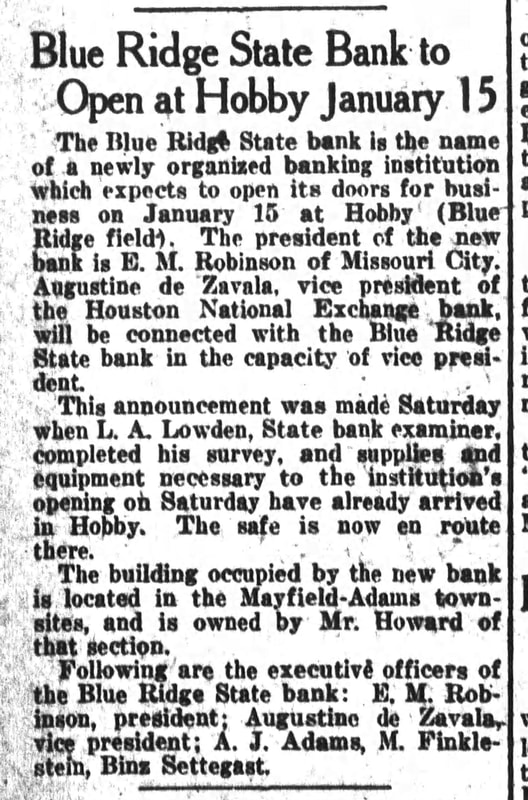 The Houston Post, Sunday, Jan. 9, 1921 On February 15, 1921, the Blue Ridge State bank was robbed and the young, well-liked cashier was murdered. A young messenger boy coming to the bank saw a man wearing corduroy pants and a white shirt covered in red leaving through a side window. When the young boy looked through the window, he saw the body of the cashier – so he ran to get help. Cashier Robert Lee Kirby had been beaten to death and all the money (except $10) had been stolen. 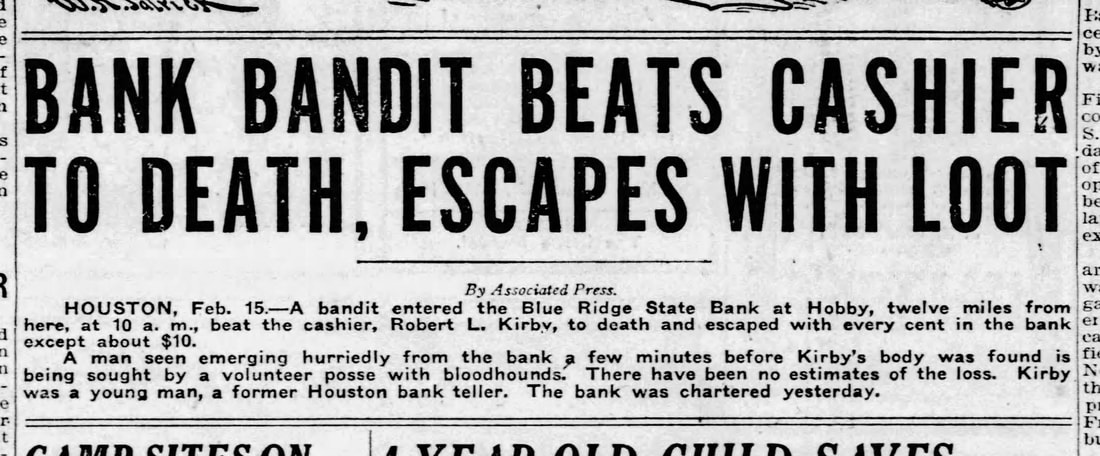 Fort Worth Star-Telegram, Tuesday, Feb. 15, 1921 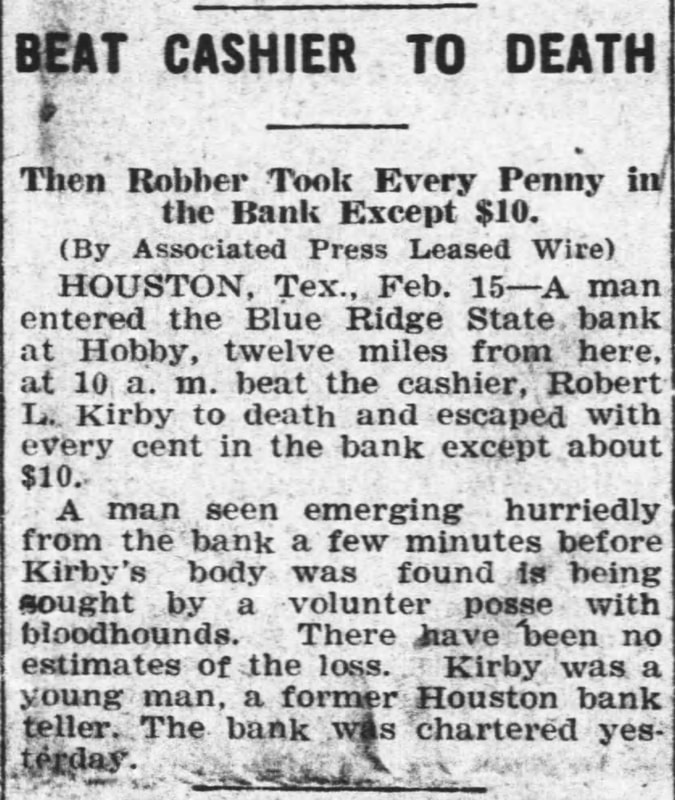 The Salina Evening Journal, Tuesday, Feb. 15, 1921 Check back on Wednesday for part two!By SHANNON CARR Museum Assistant The art of flower pressing has been around since early human civilization. Pressed laurels and garlands were even found in the 3,000-year-old coffin of Tutenkhamun’s mother in Egypt! However, the official art of pressing flowers to form decorative images originated in the 1500s and is called Oshibana. The art of Oshibana uses pressed flowers, petals and other plants to create a detailed image. Through interaction between Japan and Europe, Oshibana became a popular art in the Victorian era.
Many books were published in the 1900s that challenged the hobbyist to make more complicated and detailed arrangements. Flower pressing also expanded various scientific fields by providing a means for explorers to preserve specimens with relative ease. The art of flower pressing has been nearly unchanged from its original development, and it continues to be a rewarding and fun hobby. Make your own flower-pressed creation by following the steps below. Happy crafting! Materials:
Directions:
TIP: Try looking for fallen petals and blooms at your local outdoor store for unique additions!
Travel log entries by Gertrude Tredwell during a trip to the White Mountains and Northampton in July 1865, http://merchantshouse.org/tag/gertrude/
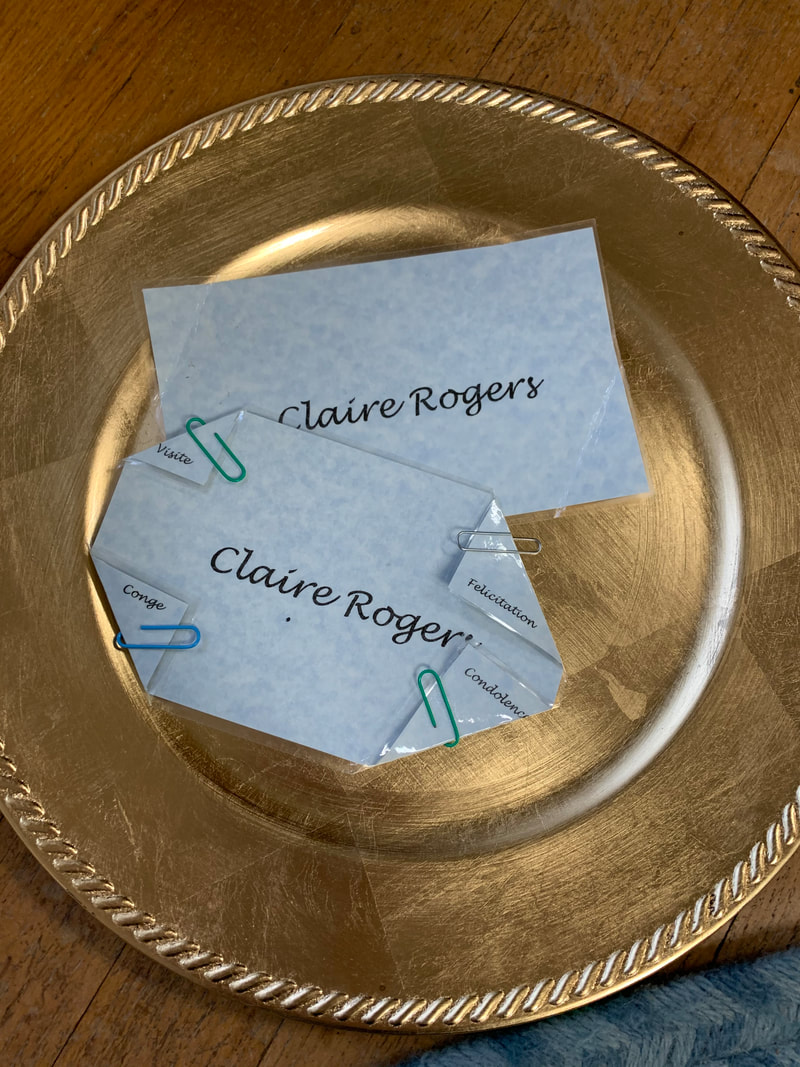
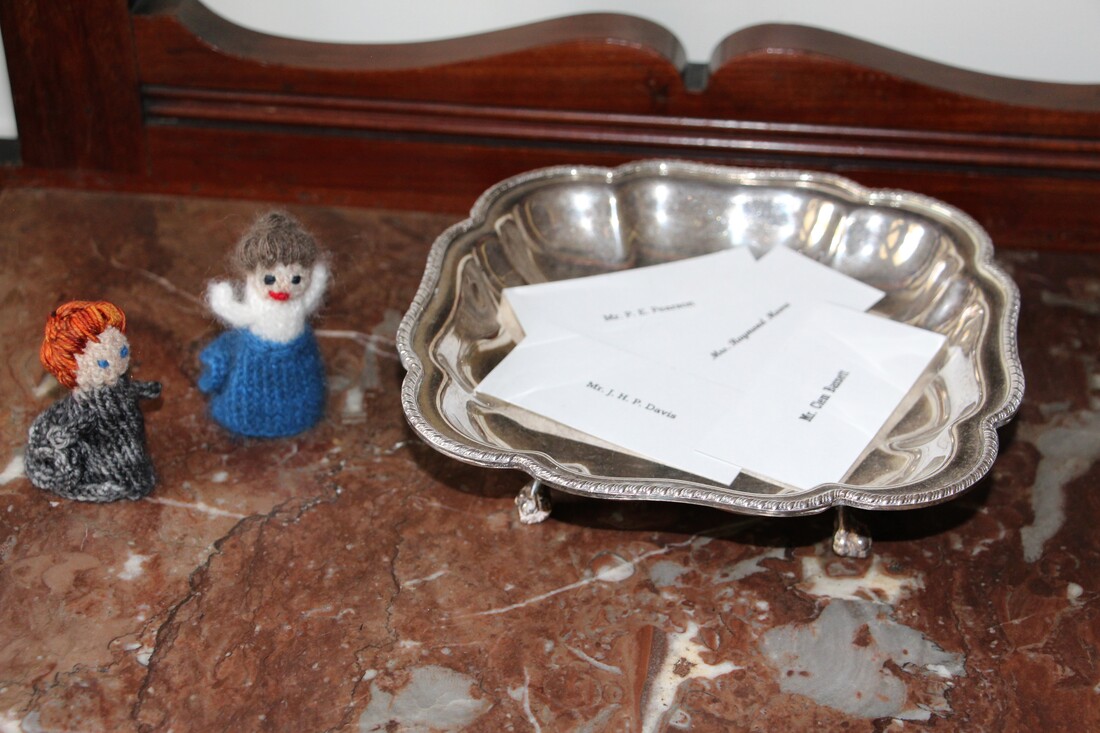 During the Victorian era, calls were an important social event. Certain afternoons were set aside as "at home days" for people to come calling; proper calls typically lasted no more than 15 minutes. If you were not well acquainted with the person you intended to visit, the appropriate time to call would be between 3 p.m. and 4 p.m. If you knew the family well, you could visit between 4 p.m. and 5 p.m. Calling cards played a big part in this elaborate ritual. Calling cards were about the size of today's business cards, though they could vary in design from a plain white rectangle to an elaborate, full-color art piece. They always had the person's name written on them -- usually in calligraphy, though printing plates could also be made of a person's card so that they could be ordered in bulk. When a caller came in person to make a call, they were shown into the parlor to wait while the butler went to see if the lady of the house was "at home." While the caller waited, he or she had the opportunity to look through the cards laying in the card receiver to see who else had paid calls recently. The cards of important people were often left at the top of the stack to impress visitors. After receiving a card or a visitor, the lady of the house was obligated to return the call, either in person or with a card. Women kept records of calls paid, received and owed; if calls were not paid, it was considered a snub -- a serious etiquette faux pas in Victorian times. A Few Calling Card Pointers
Make Your Own Calling Card
Materials needed from the original game: Not provided:
Directions:
1. Cut apart all of the new Settler’s Surprise Cards, mix them with the original cards, and place all of them on top of the game board. 2. Cut apart all of the buildings on the Building bank page and stack them up nearby for easy access. 3. Give each player a player page. 4. Follow the rules listed on the game board to play:
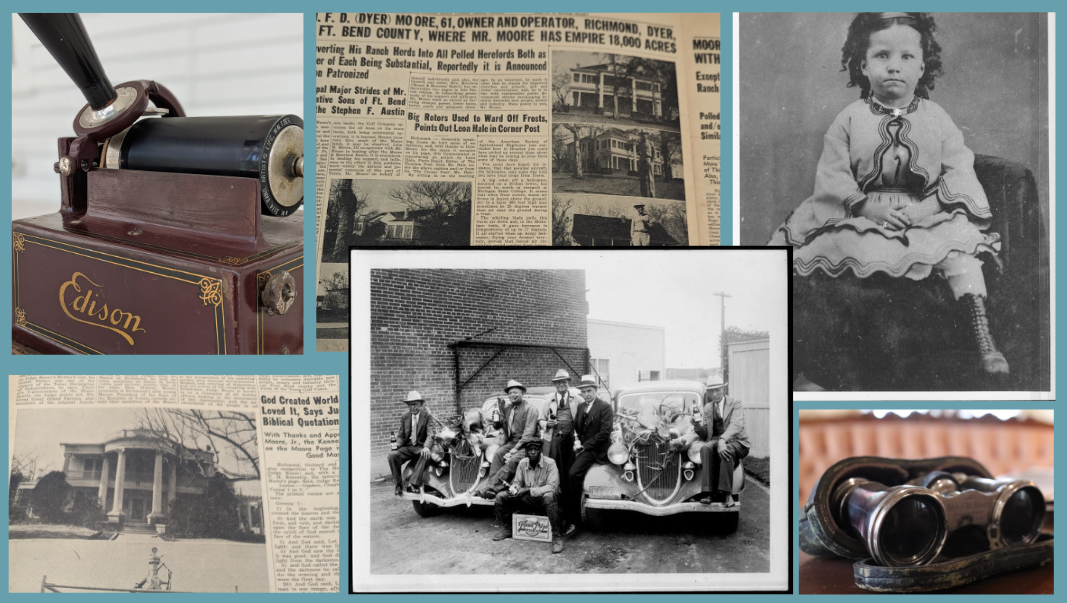
HAVE FUN!! Note: The two “lose a dice roll of food” squares are different. The first one (with a jar on it) is in reference to your food stores running low in winter, and the second (with a pig) is because wild pigs have come through and eaten some of your food. By ALLISON HARRELL Texian Time Machine & Outreach Coordinator The Spaniards brought cattle with them to the New World (or America) in 1541. With the introduction of cattle to the ecosystem, they also introduced the occupation of ranching. Here in Fort Bend County, the Moores, Georges and Dews, to name a few, were all part of that grand tradition. Like the Spanish before them, the Texian pioneers branded their cattle. Branding is a method of marking cows that can be traced back to the ancient world. (There are 4,000-year-old Egyptian paintings of cattle branding and it is even mentioned in the Bible!) Branding was important because, until the invention of the tattoo, it was one of the only ways that a person could differentiate their cows from the cows of another rancher. Since most cattle ranged free much of the time, it was important to be able to establish ownership. 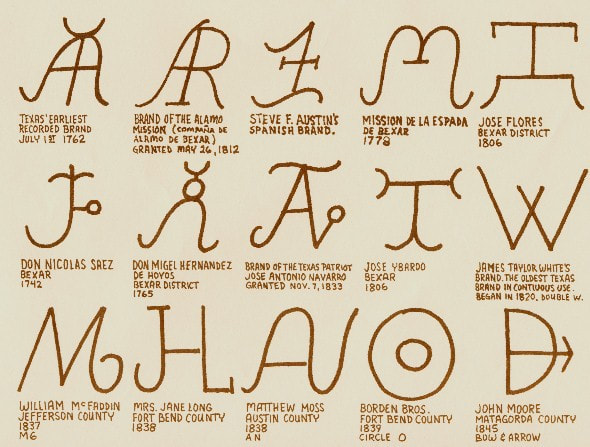 Early Texas brands. Brands were important markers, and had to be unique to the owner. Richard H. Chisholm owned what might be the first recorded brand in Texas. To help keep track of each brand and ensure no markings were doubled, ranchers were required to register their brand with the government. Registration became even more important in 1848, when provisions were passed stating that unless a brand was registered with the county clerk, it was not a valid legal means of establishing ownership of a cow. Since that time, a great deal of legislation has gone into the finer points of branding -- including the punishments for branding over someone else’s brand or using someone else’s brand in general. LOCATION Traditionally, brands were placed on the left hip of the cow (though the placement is not set by law). EAR MARKS Sometimes ear marks were used in addition to or instead of a brand. These were most popular among the early settlers of New England. An ear mark was a cut made into the ear of the cow, where shape and location functioned as a brand unique to the rancher. These ear marks were also registered with the government. In Texas, some ranchers used both the ear mark and the brand to identify their cattle, and both needed to be registered. Ear mark registries were filled with colorful language to describe the cuts that were made into the ears; each cut type and shape had a name to assist in the description. (The "jinglebob" was considered “one of the most hideous earmarks ever devised” and was unique to John Chisum of west Texas.) 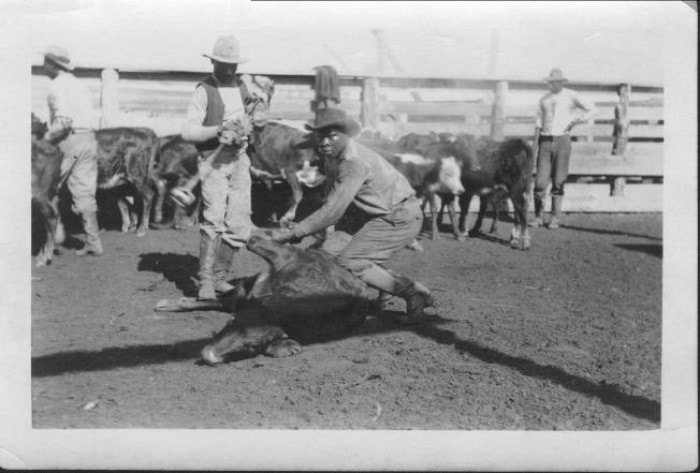 This 1922 photo from our collections shows African American cowboys branding cattle at the John Moore Ranch. Men are identified on back, left to right, as Joe Foster, Frank Johnson, Judge Mason and Mathina Harris. Johnson is holding branding iron; Mason is holding down calf. THE PROCESS OF BRANDING Cattle were ready for branding somewhere between the ages of six months to a year. Calves were typically tied down in a pen, or roped and held down, for the duration of the branding.To ensure the clearest brand possible, a number of factors come into play:
BRAND LAWS In Texas, brands must be registered with the county clerk's office. For a $5 fee, you can register your brand for 10 years. You must specify the symbol itself and the location it will be placed on the cow. Create Your Own Brand and Show Us Your Herd!
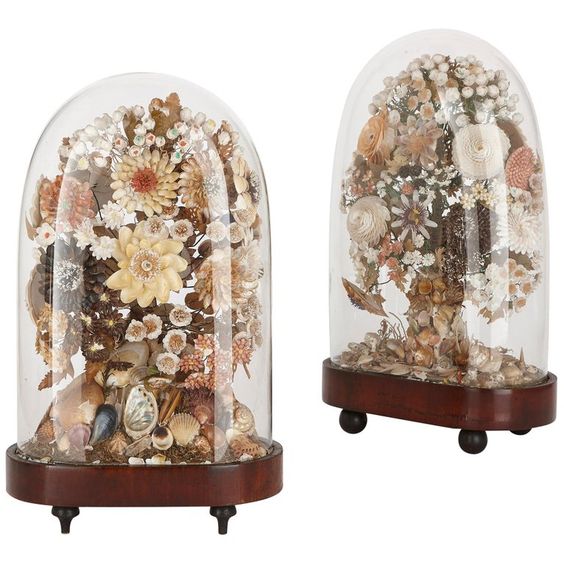
Many families displayed their prized collections in their parlor under a glass dome, generally known as a "shade." These beautiful blown-glass shades were found in nearly every home, where they served as a showpiece and protected a variety of treasures. At times, these treasures and collections could be very elaborate and include artful displays of dried flowers, feathers, taxidermy, and even hairworks. Sometimes when a collection outgrew the dome it was moved to a larger space such as a cabinet or a “wonder room." These cabinets of curiosity held wondrous, extraordinary and sometimes oddities of the natural world. Take a walk around your home or neighborhood to explore the natural world around you like children did centuries ago. Keep your eye open for wonderful treasures and specimens to fill your very own dome. Once it is finished you can display it for all to see in a special place inside of your home! Make Your Own
Directions
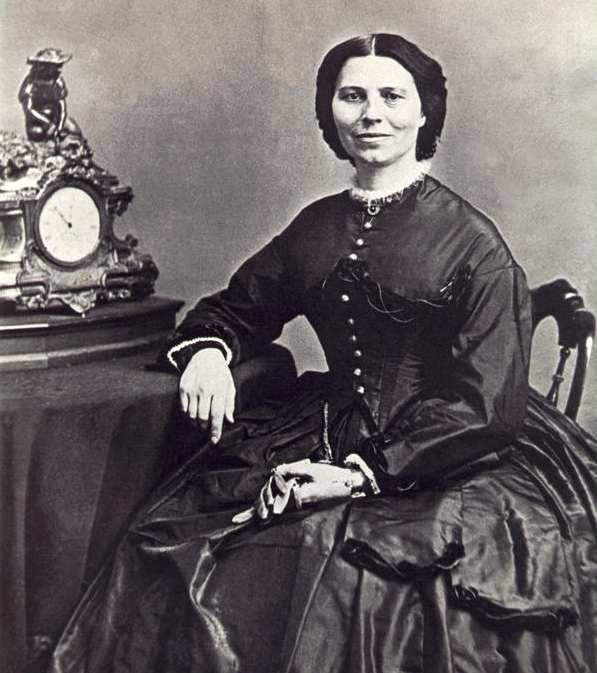
Family Activity: Who Is It?Clara Barton worked a lot with the Office of Missing Soldiers to reunite soldiers with their families. This was in a time before photographs were widely available. Imagine having to describe a loved one and hoping that someone matched that description! Could you do it?
Scoring
|
Funding has been provided to the Fort Bend History Association from Humanities Texas and the National Endowment for the Humanities as part of the 2020 Coronavirus Aid, Relief and Economic Security (CARES) Act of 2020.

AuthorFort Bend Museum Staff Archives
December 2020
Categories |
|
The Fort Bend Museum is owned and operated by:

|
Accredited by:

|


 RSS Feed