Blog
A number of activities and topics of interest are included in the blog posts below. For educational curriculum enhancers on Texas history, visit the Fort Bend Connection page.

|
By ALLISON HARRELL Texian Time Machine & Outreach Coordinator Chuck-a-Luck is a game that began in English pubs and made its way to America around 1800. The game has had a number of names through the years, including Birdcage, Sweat and Sweat Rag. (Watch this great video from the Alamo for an explanation on those last two names!)
Directions:The game has two roles:
1. Dealer – He/She is responsible for rolling the dice and paying out/collecting bets 2. Players – They are responsible just for betting The game is very simple.
4 Comments
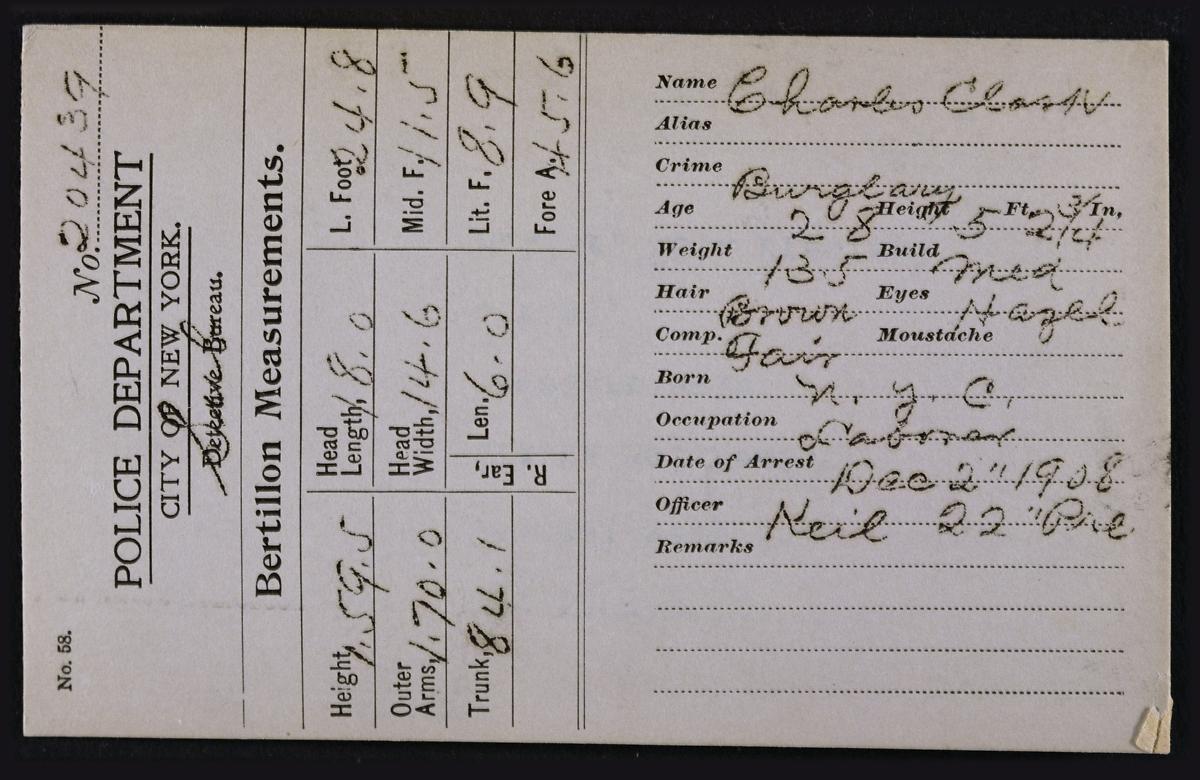
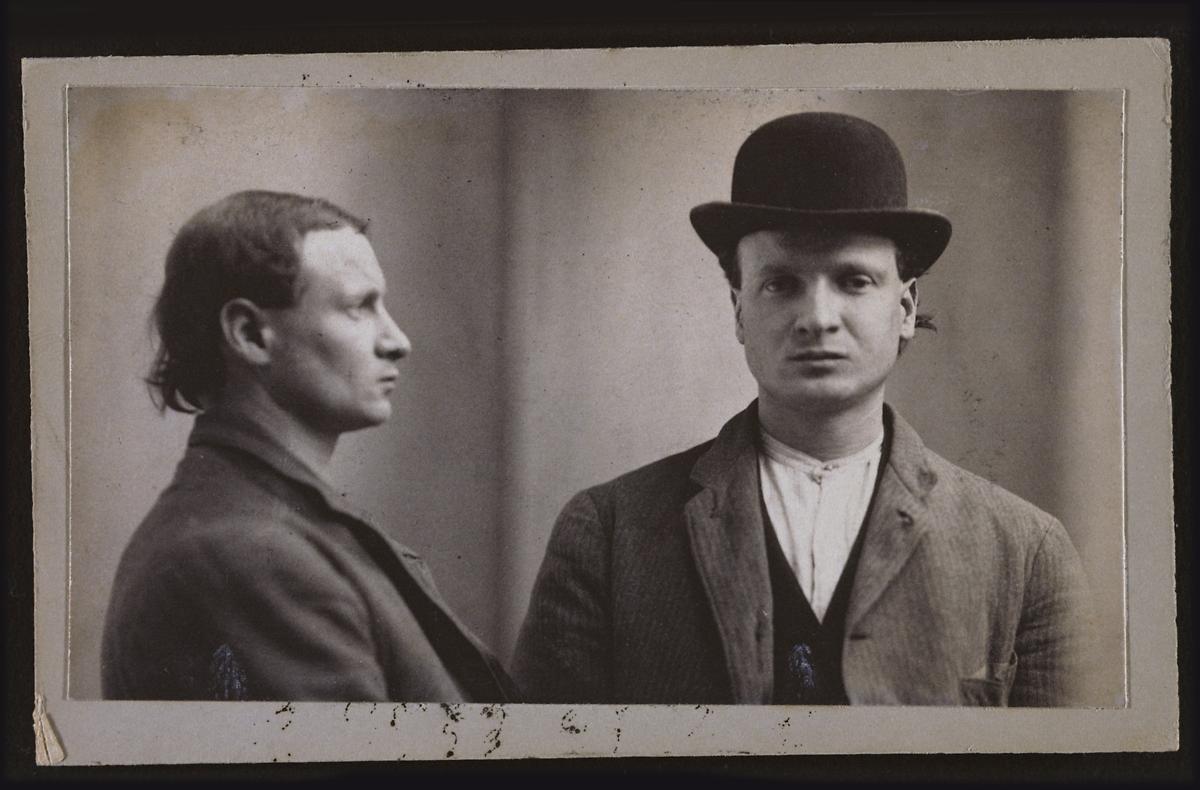
Bertillon Card ActivityMaterials
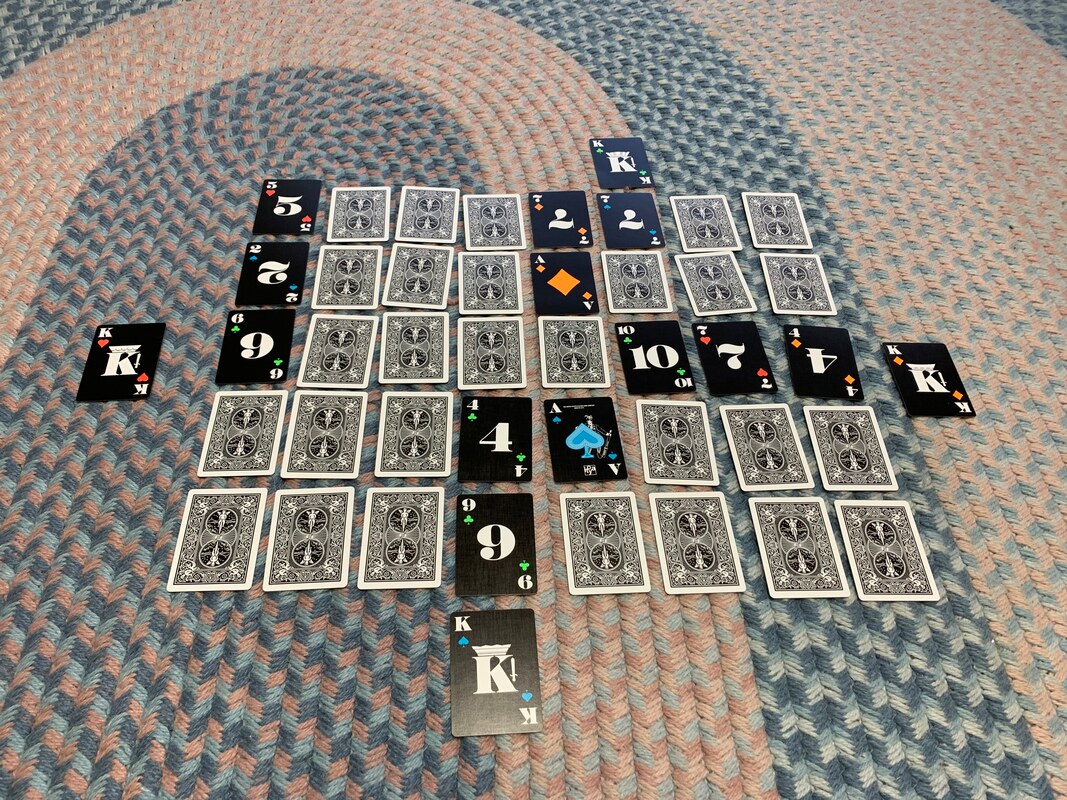
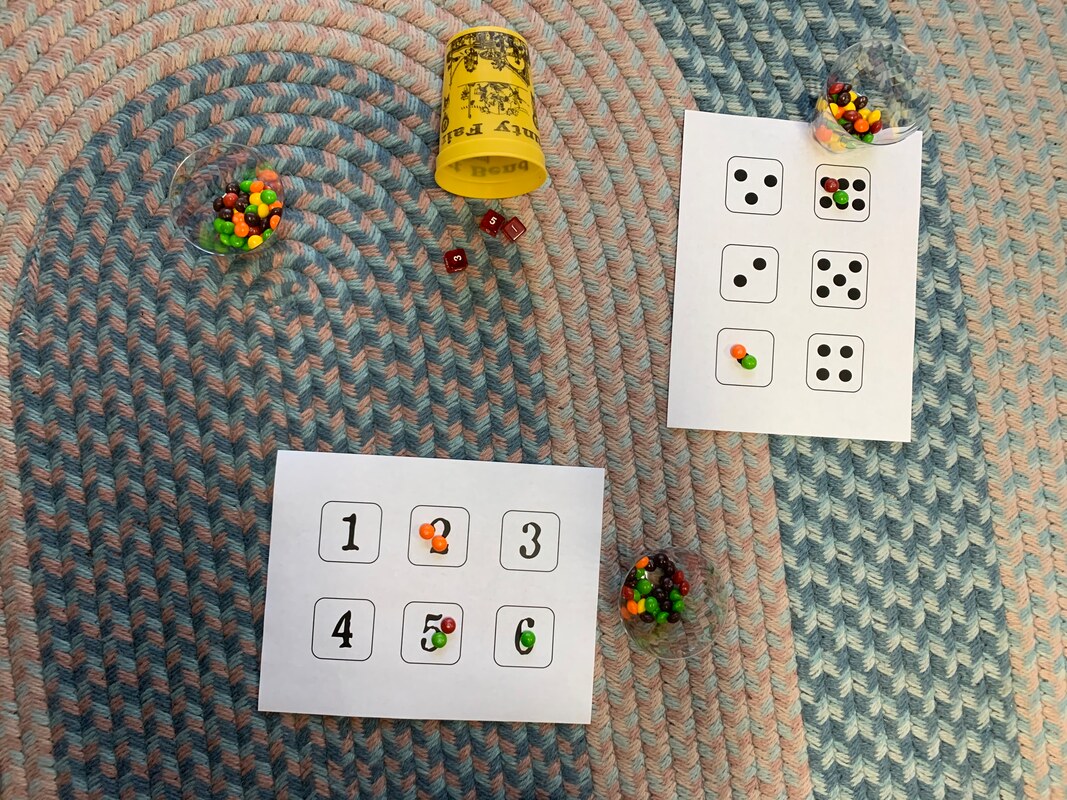
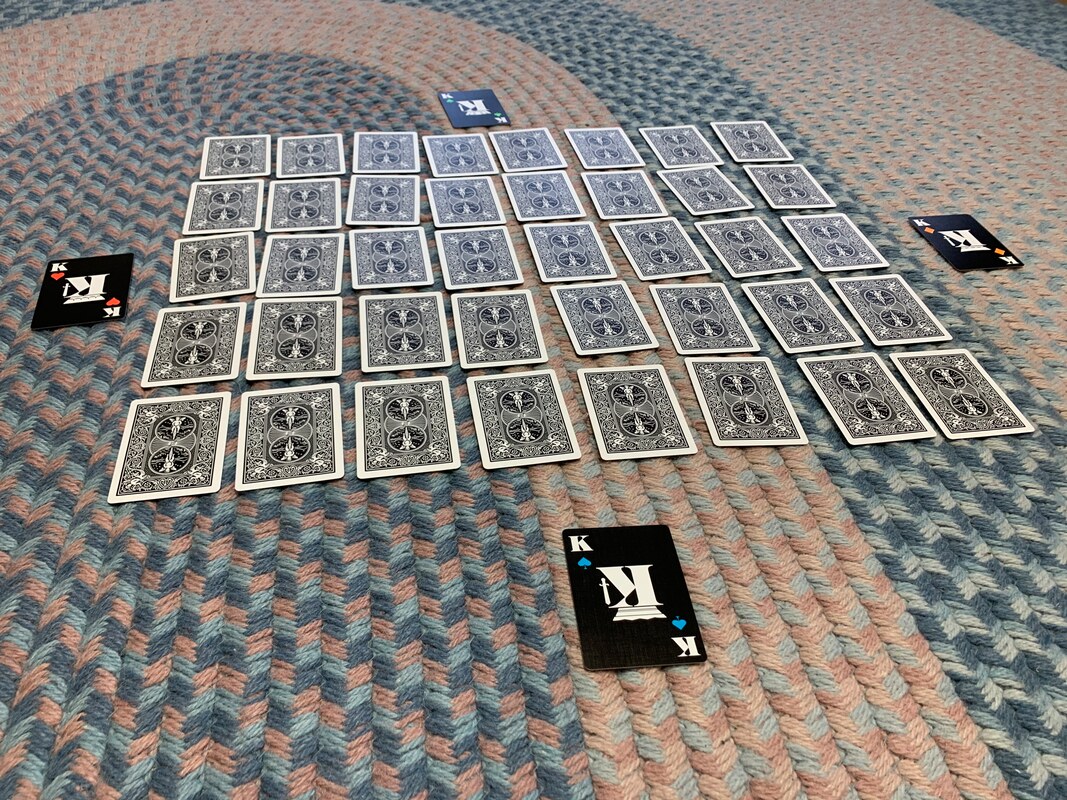
 By ALLISON HARRELL Texian Time Machine & Outreach Coordinator SCENE: You are a pioneer who has been living in Texas for a year, and a few new settlers have been staying with you for the past few days. This morning when you got back from taking care of the chickens, you found a note: “We have gone out to explore a little, and will be back by lunch time.” When no one returns by nightfall, you start to get worried. The Texas prairie is confusing at the best of times, and these people have only been in Texas for three days! You have to go into the prairie and find them. You set out early the next morning with a plan and food rations to last a few days. Explore the prairie and find all of your friends! MATERIALS:
GOAL: Find all the Aces! (The Ace cards are your friends who are lost in the prairie.) DIRECTIONS:
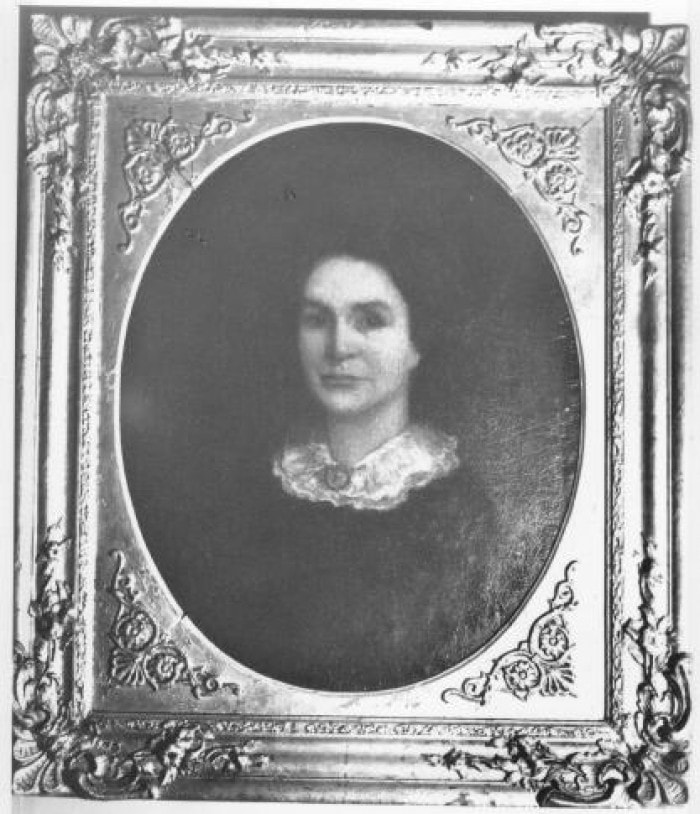
 Jane Long's Lasting Legacy in Fort Bend County HistoryOn a frigid Friday in December 1821, Jane Herbert Wilkinson Long gave birth to a baby girl on Bolivar Peninsula. Accompanied only by her five-year-old daughter and Kian, an enslaved African American woman, Jane believed that she was the first Anglo woman to give birth to a child in Texas. Though census data contradicts that claim, her nickname and legacy as the “Mother of Texas” stuck.
On Her OwnJane didn’t learn of her husband’s death until later that summer. Alone in Texas with two daughters to provide for, she initially tried to seek a pension from Mexico for her husband’s accidental death, but was unsuccessful. In 1824, she received a title to a league of land in Fort Bend County and a labor of land in Waller County from empresario Stephen F. Austin. She sold a portion of her Fort Bend County league to Robert E. Handy, who later developed the town of Richmond. Boarding HousesIn addition to her ranching and farming endeavors, Jane also operated two boarding houses. She started the first in Brazoria in 1832; her guests included Sam Houston, Mirabeau Lamar and William B. Travis. In 1837, she opened a second boarding house in Richmond, which became a center for social and political activities pertaining to Texas independence. 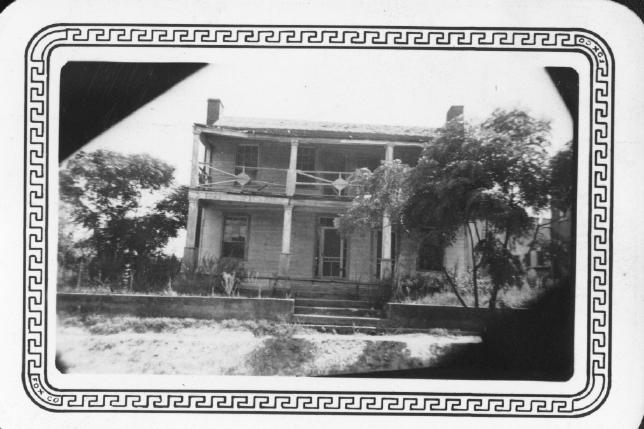 This 1939 picture shows Jane Long's boarding house. At the time, it was the oldest building in Richmond. Sources suggest it either burned down or was torn down sometime before 1962. Later LifeFolklore and family tradition say that Jane was courted by several famous Texans, including Sam Houston and Mirabeau Lamar. Jane never remarried, however, and died in December 1880. She is buried in Morton Cemetery.  ABOVE: You can see Jane Long’s piano inside the Long-Smith Cottage here at the Museum. Though she never actually lived there, the house was originally built on land owned by Jane Long. What subjects were taught in one-room schools? Reading, Writing and Arithmetic were the main subjects taught in one-room schools. They were called the "Three Rs" (Reading, 'Riting and 'Rithmetic). Recitation, the act of saying a verse or paragraph aloud from memory, was sometimes added as a fourth "R." Geography could also be a featured school subject -- but science and history were not taught as we know it today.
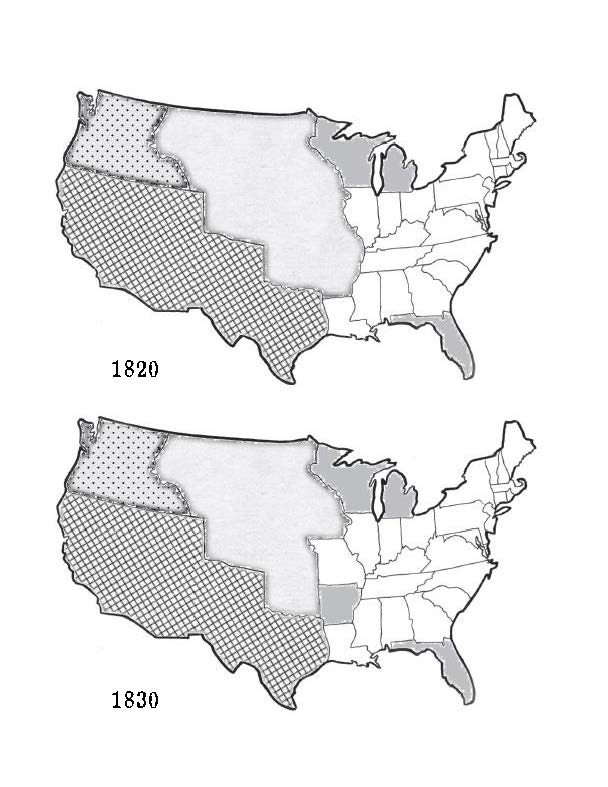
What is the difference between a territory and a state?
What is the difference between an unorganized territory and an organized territory?
*Answers:
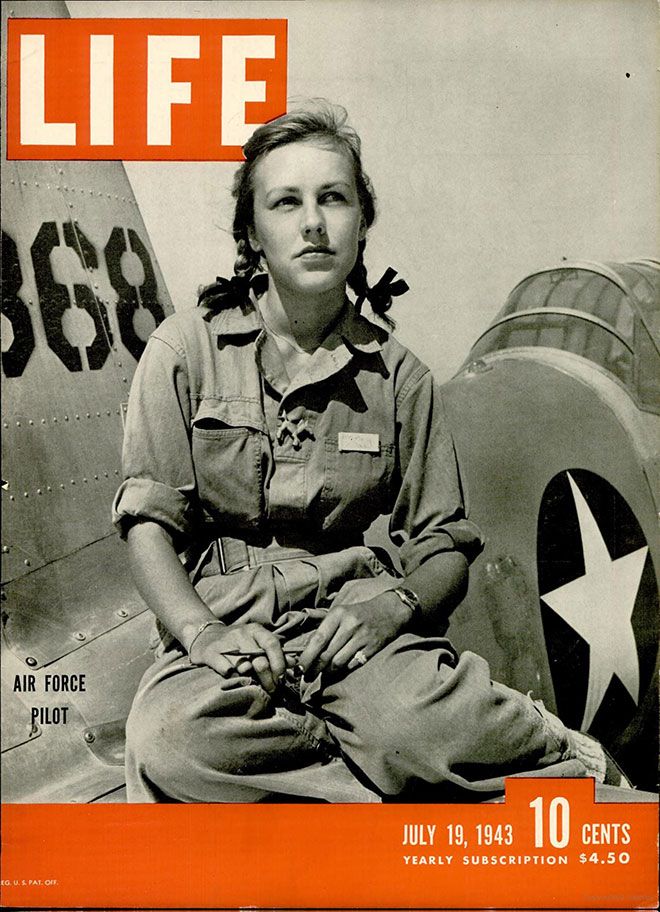
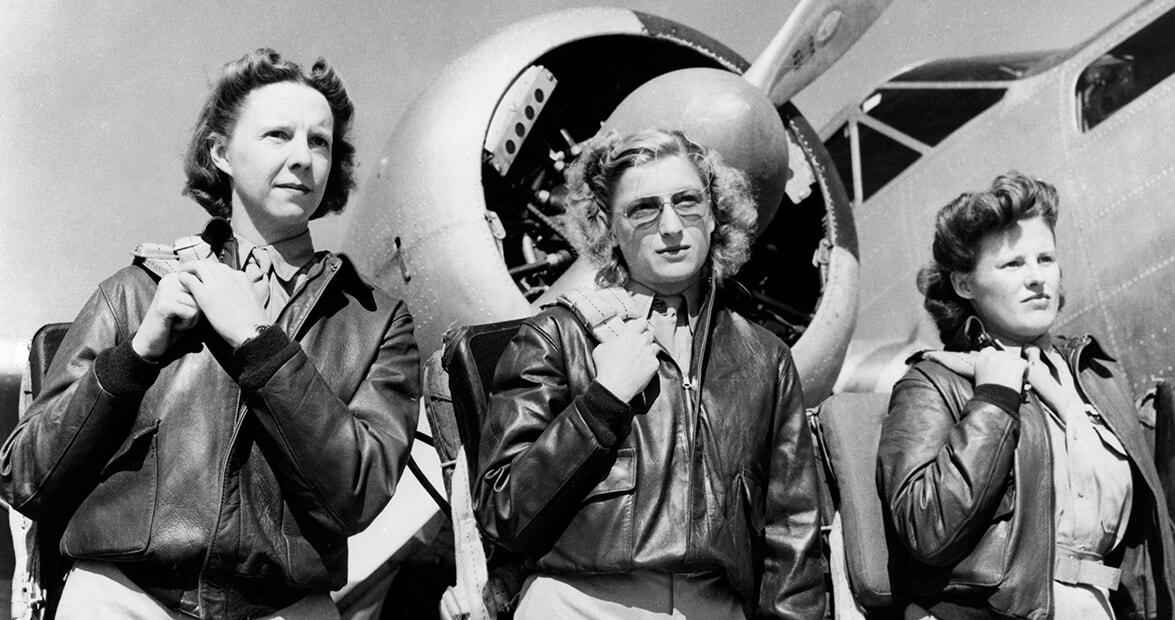
By JESSICA AVERY Programs Coordinator During World War II, the United States found itself in short supply of male pilots. With most men fighting overseas, the U.S. desperately needed trained pilots for non-combat missions in America. Women throughout our country then answered the call, leading to the creation of the first female squadron. Between 1942 and 1944, more than 1,000 women volunteered their time to become Women Airforce Service Pilots – WASPs for short. The head of the WASP program was Jacqueline Cochran, a pioneering aviator who later became the first woman to break the sound barrier!
FifinellaAs with all military units, the WASPs needed a mascot! Roald Dahl, who served as pilot in the Royal Air Force during World War II, had heard stories of little “gremlins” who were responsible for aviation difficulties like tampering with plane engines. Dahl was inspired to create a children’s story about these mischievous gremlins -- but with a few tweaks.
Paper Airplane ChallengeNow it's your turn to fly a plane! Download the paper airplane instructions here and then create your own fleet! How far can your airplanes fly?
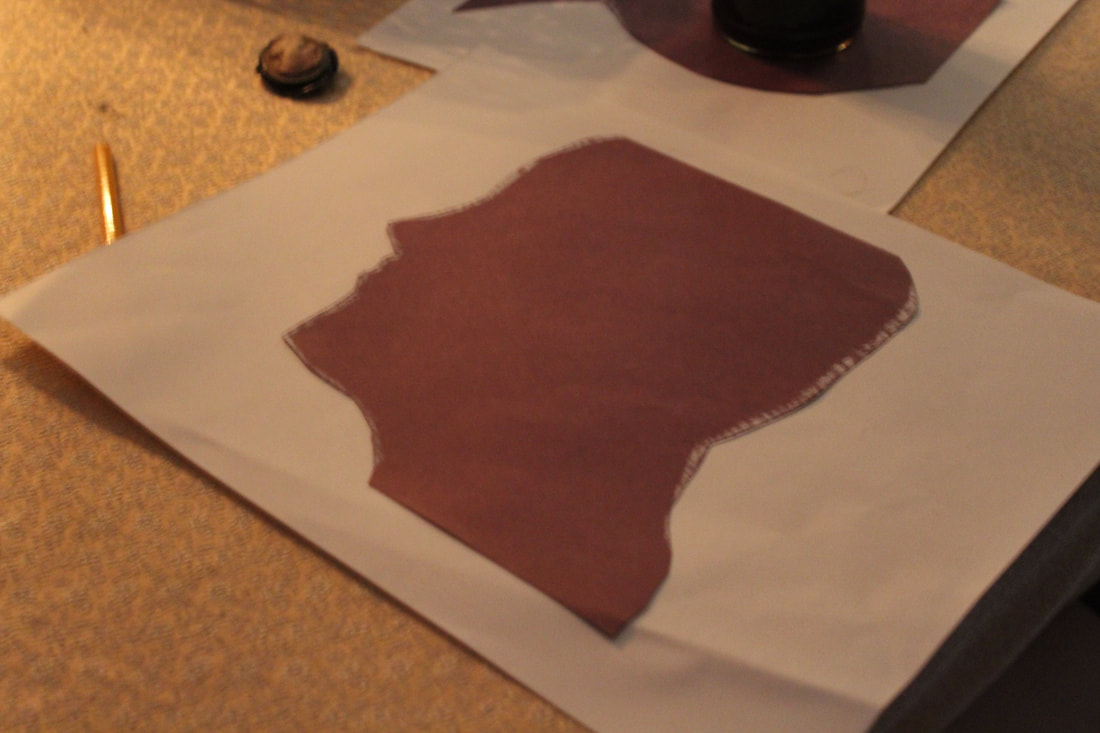
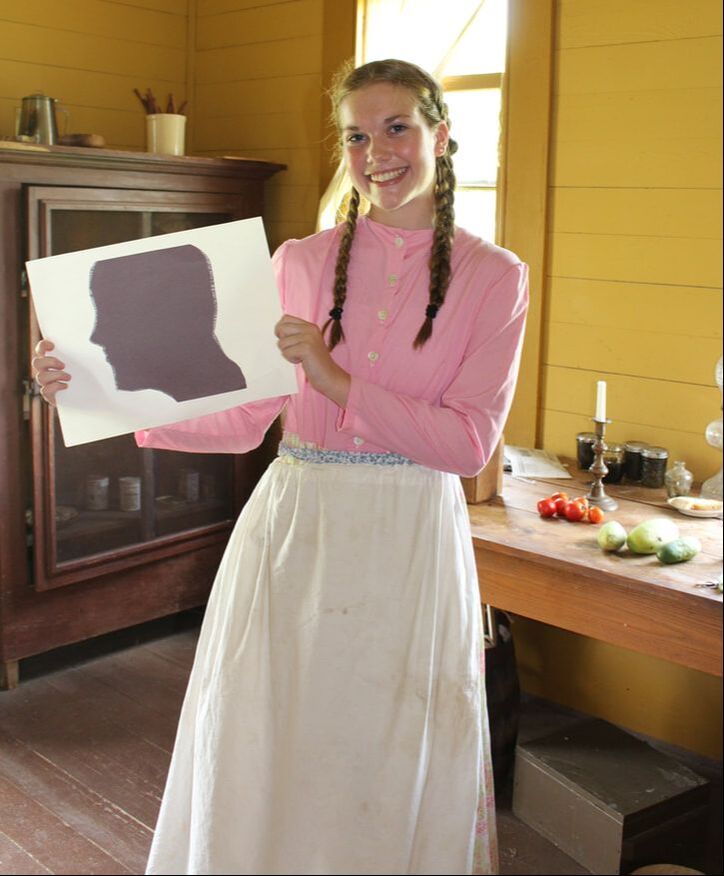
The term "silhouette" is attributed to a man named Etienne de Silhouette, a finance minister living in France during the mid-18th century. One of Etienne’s favorite hobbies was to create small and detailed images for friends and family using only scissors and paper. The art form's relatively cheap cost and few required supplies only encouraged Etienne’s enthusiasm for silhouette art and portraits. (He was a finance manager, after all!) The invention of the camera in 1816 caused a decline in popularity for silhouette portraits. However, there has recently been a resurgence of admiration for the art -- so why not try your hand at this fun and inexpensive craft?! Make Your Own Silhouette Portraits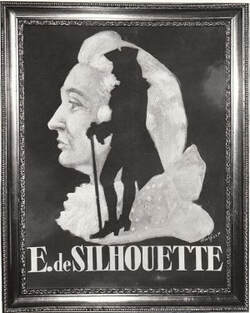 Etienne de Silhouette, https://bookshelf.mml.ox.ac.uk/2015/09/23/great-french-lives-etienne-de-silhouette/ Etienne de Silhouette, https://bookshelf.mml.ox.ac.uk/2015/09/23/great-french-lives-etienne-de-silhouette/ Materials:
  Vocabulary: BlockadeA blockade is a war tactic where one side will block all of the ports and trade posts of the other in an attempt to keep any goods from getting to the other side. History: Galveston During the Civil WarOn October 4, 1862 William B. Renshaw sailed into Galveston harbor with eight ships and demanded that the port surrender. Colonel Joseph J. Cook (the Island's Confederate commander), managed a four-day truce while he evacuated his men. By December 25, Union reinforcements had taken the town. Then, on January 1, 1863, the Confederates entered Galveston Bay before dawn and a battle began. By the time the fighting was over, the Confederates had lost 26 men and had 117 wounded men. The Union, however, lost 150 men plus a number of captured infantry, the Harriet Lane and the Westfield. The Confederacy held Galveston for the rest of the Civil War. History: The 'Anaconda Plan' BlockadeUnion General Winfield Scott came up with the “Anaconda Plan,” which included blockading the South’s ports to strain the South’s economy. The blockade started April 19, 1861 (a few weeks after the war started). Five hundred Union ships were allocated to patrol from Virginia to Florida and from Florida to Texas. The blockade covered 3,500 miles of coast and 180 ports and was intended to stop the export of cotton and in the import of ammunition and war supplies. Some Southerners attempted to run their ships through blockade; surprisingly, about 80% were successful and made it through! Ready to give it a try? Set up a blockade in your bathtub and see if your ships can make it through the Union blockade! Activity: Bathtub Blockade!Materials needed:
Directions:
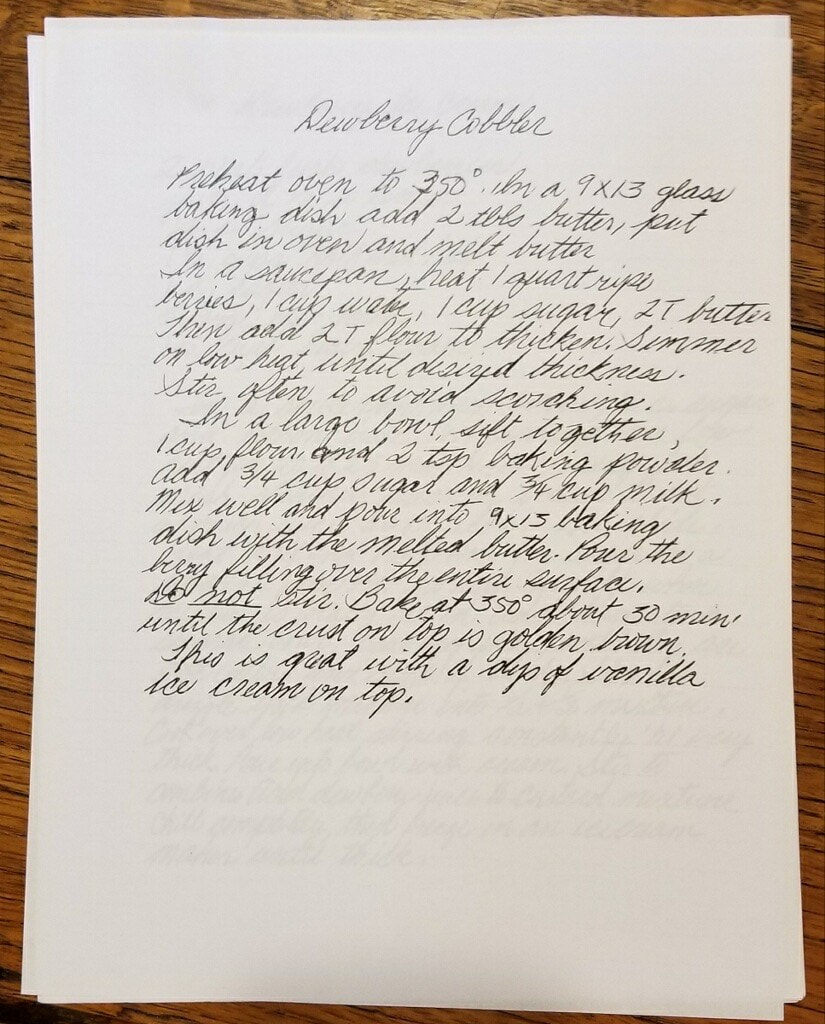
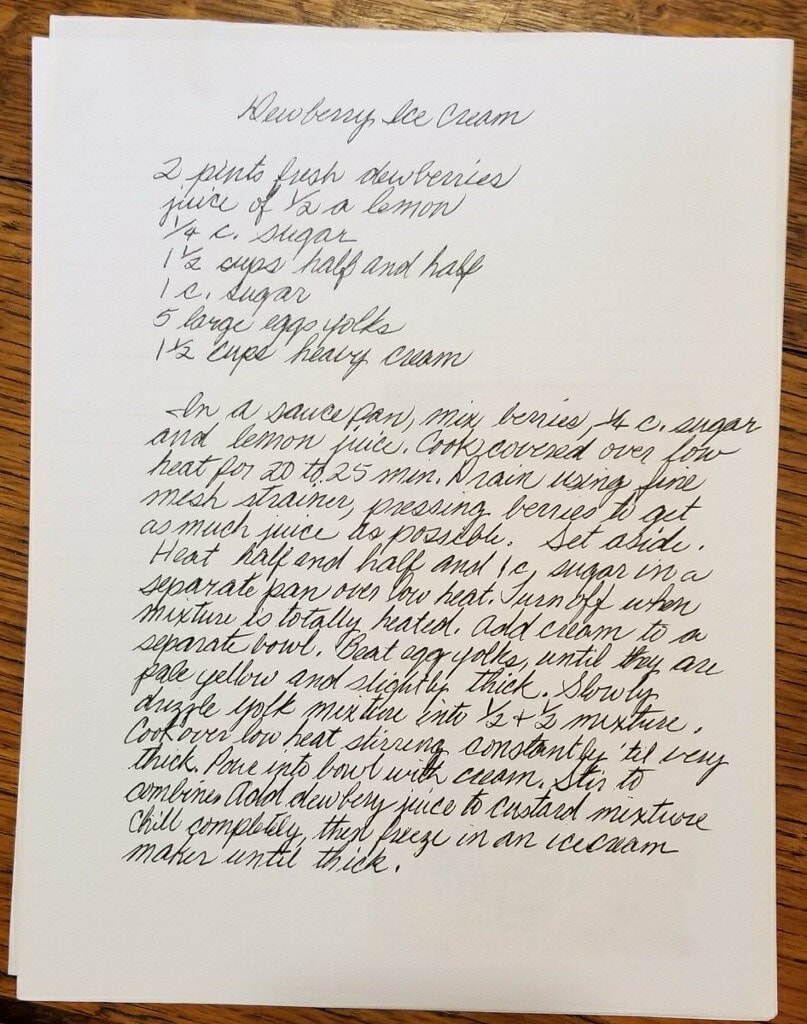
 As we near the end of dewberry season, it is almost time for blackberry season! If you a drowning in berries, here are two recipes from the Moore family that you can try: Dewberry Cobbler and Dewberry Ice Cream. Blackberries can easily be substituted for dewberries in these recipes. Enjoy! (And let us know if you try the recipes! Tag us on Facebook or Instagram with your berry dish!)
Dewberry Ice Cream
|
Funding has been provided to the Fort Bend History Association from Humanities Texas and the National Endowment for the Humanities as part of the 2020 Coronavirus Aid, Relief and Economic Security (CARES) Act of 2020.

AuthorFort Bend Museum Staff Archives
December 2020
Categories |
|
The Fort Bend Museum is owned and operated by:

|
Accredited by:

|

 RSS Feed